General information
Neural Prophet is a time-series forecasting model inspired by Facebook Prophet and AR-Net (for autocorrelation modeling). It is built on PyTorch and combines Neural Networks and traditional time-series algorithms.
Neural Prophet includes all the components from the original Prophet model: trend, seasonality, recurring events, and regressors. Further, Neural Prophet now also provides support for auto-regression and lagged covariates. That's particularly relevant in the kinds of applications in which the near-term future depends on the current state of the system.
It also provides an automatic selection for the hyperparameters related to model training. In addition, the model is adaptable to different forecast horizons (greater than 1) and its components can be interpreted with the corresponding visualizations.
Description
Brick Locations
Bricks → Machine Learning → Neural Prophet
Brick Parameters
Simple mode:
- Datetime
Dataset column that specifies the datetime of the observation.
- Target Variable
A column that contains the values to be predicted.
- Frequency (’Auto’ by default)
- days
- hours
- minutes
Data step sizes (frequency of data recording).
Available time units (‘Custom’ frequency):
Regression / Auto-Regression
- Future Regressors (optional)
Regressors as lagged covariates with order 1 or as known in advance.
- Lags (0 by default)
Previous time series steps to include in auto-regression i.e. AR-order.
- Lag-Regressors (optional)
Covariate or list of covariate time series added as additional lagged regressors to be used for fitting and predicting.
- Forecasts (1 by default)
The number of steps ahead of prediction time step to forecast.
Events (optional, if optional events input is connected)
- Datetime
A column from the optional events input that contains the dates for the user-specific events.
- Events column
A column from the optional events input that specifies the names of the user-specific events.
- Country Holidays (optional)
Include the country’s specific holidays in the forecasting.
Advanced mode:
- Confidence Interval (5% - 95% by default)
Lower and upper bounds of the confidence interval.
Seasonality (’Auto’ by default)
- Yearly
Whether to fit a yearly seasonality.
- Weekly
Whether to fit a weekly seasonality.
- Daily
Whether to fit a daily seasonality.
Model Training
- Epochs (’Auto’ by default)
The number of epochs (complete iterations over the dataset) to train a model.
The recommended value is 5-500 epochs.
- Batch Size (’Auto’ by default)
Number of samples per mini-batch.
- Learning Rate (’Auto’ by default)
Maximum learning rate (step size at each iteration).
- Newer Samples Weight
A factor by which the model fit is skewed towards more recent observations.
Outputs
The components that will be included in the output dataset.
Available options:
- Return AR components
- Return Trend
- Return Regressors
- Return Events
- Return Seasonality
Brick Inputs/Outputs
- Inputs
- Data
- Optional events
Brick takes the dataset with time-series data.
A dataset that contains all the user-specified events. It must contain the datetime column and a column with the event name for each date.
- Outputs
- Data
- Model
Brick returns the model predictions with their confidence intervals. Depending on the selected options in the ‘Outputs’ sections of the advanced mode, the output dataset may contain additional components.
A trained Neural Prophet model that can be used in other bricks as an input.
Example of usage
Let’s see how to use the Neural Prophet model for time series forecasting.
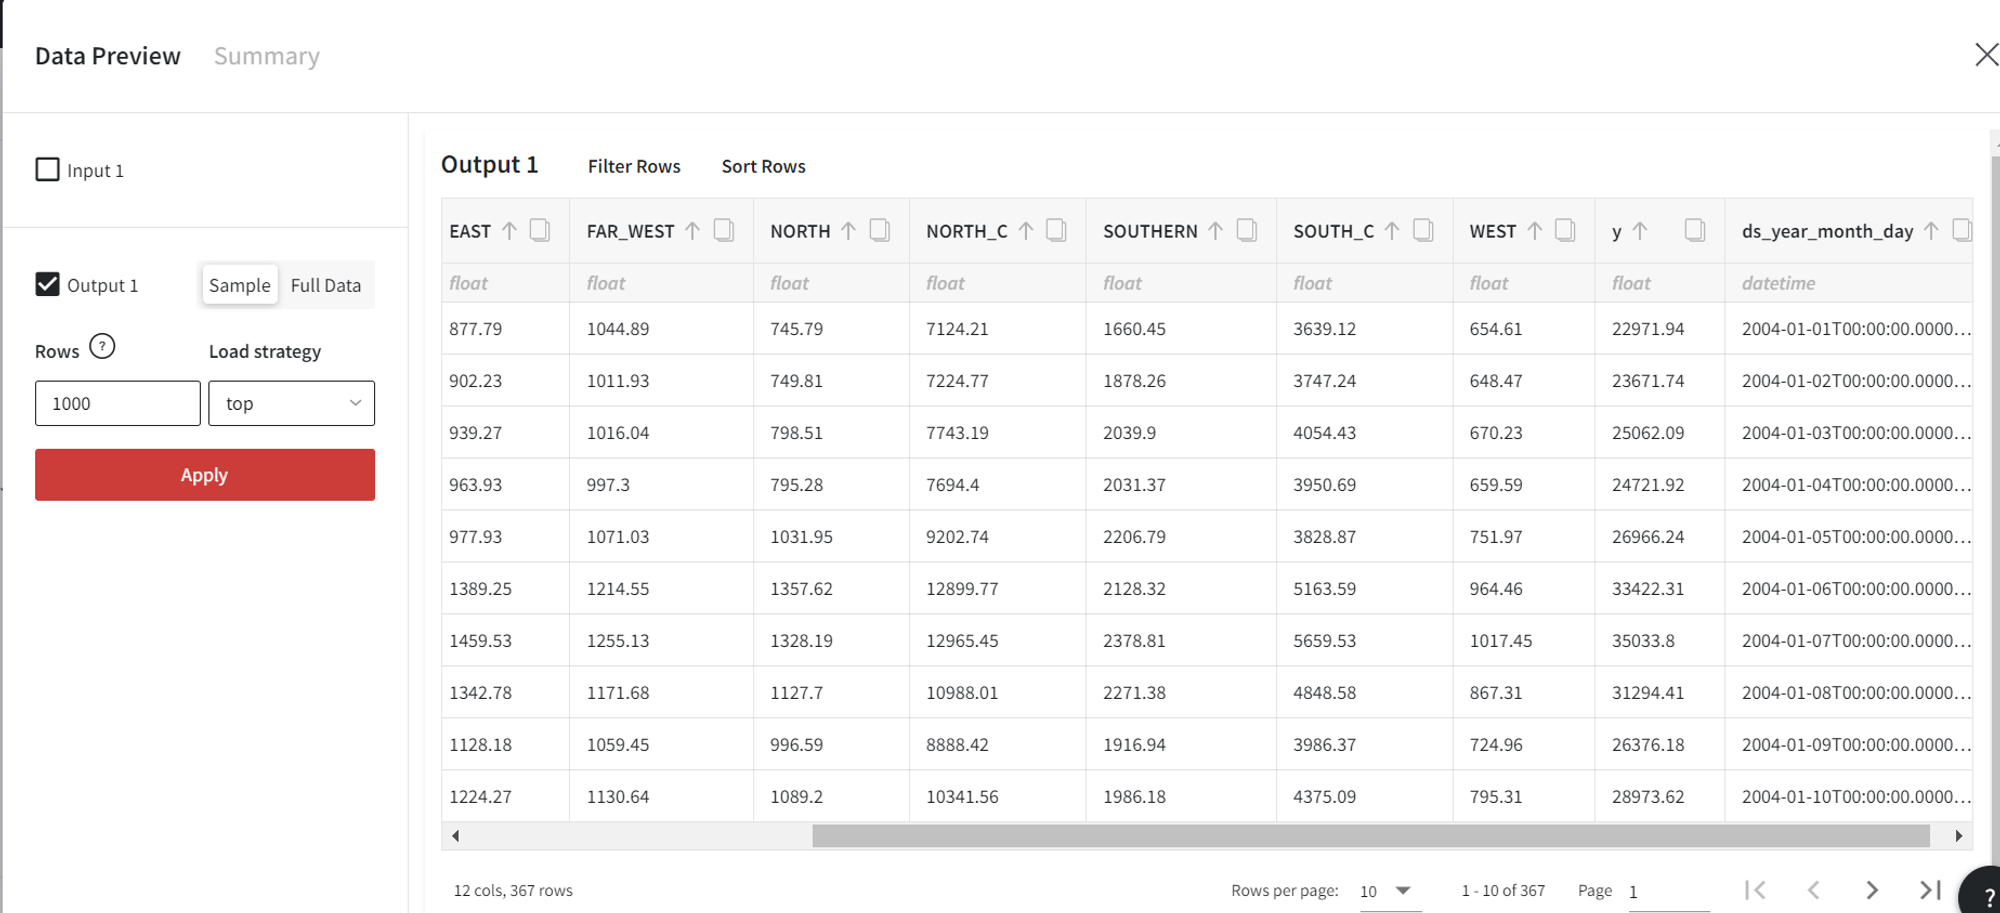
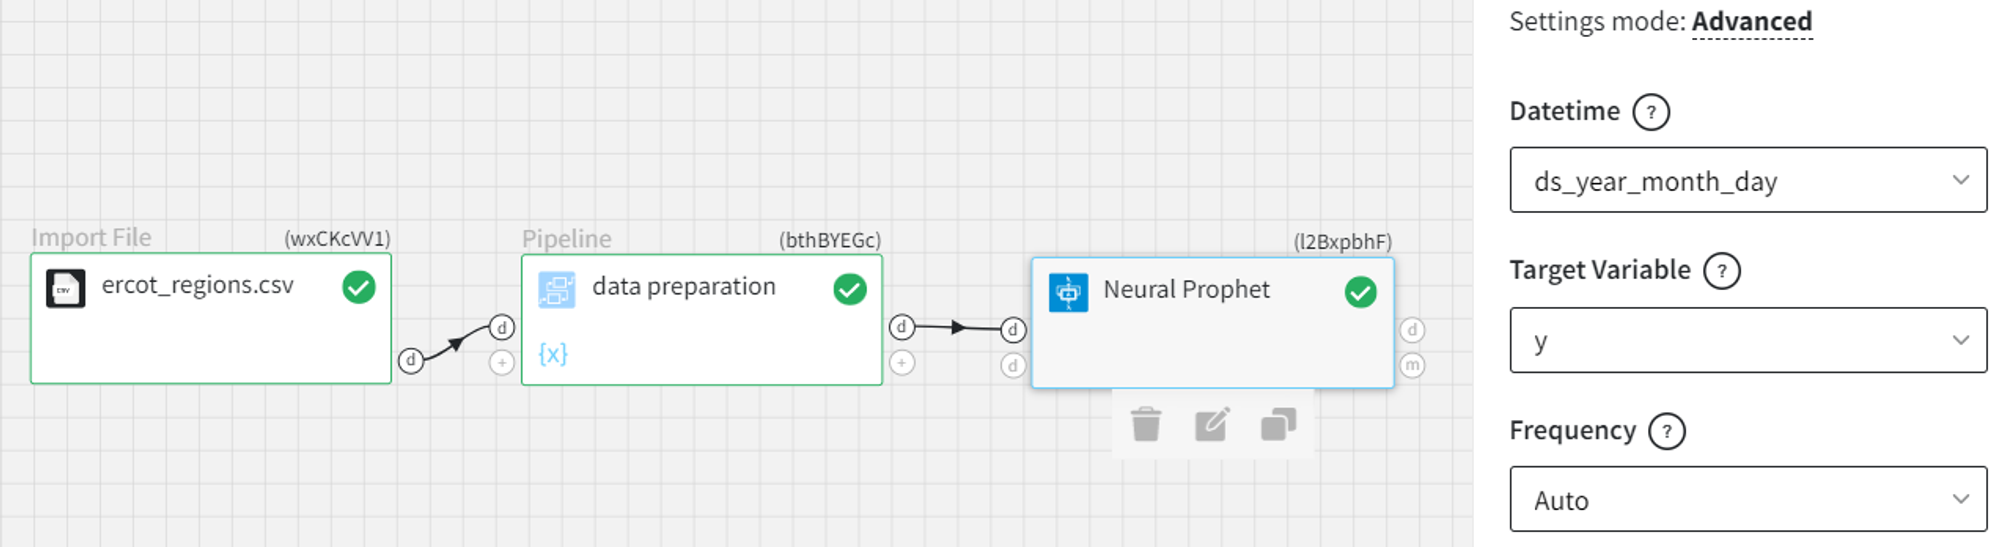
For example, we have a dataset with the date column ‘ds_year_month_day’ (1-day frequency), ‘y’ as a target variable, and other numeric regressor columns.
Based on this data, we can train the Neural Prophet model to forecast the values of ‘y’.
In the configuration, we need to fill in the ‘Datetime’ and ‘Target Variable’ fields and choose the frequency of dates (which can be automatically determined). Also, we set the auto-regression parameters and use the USA-specific holidays.


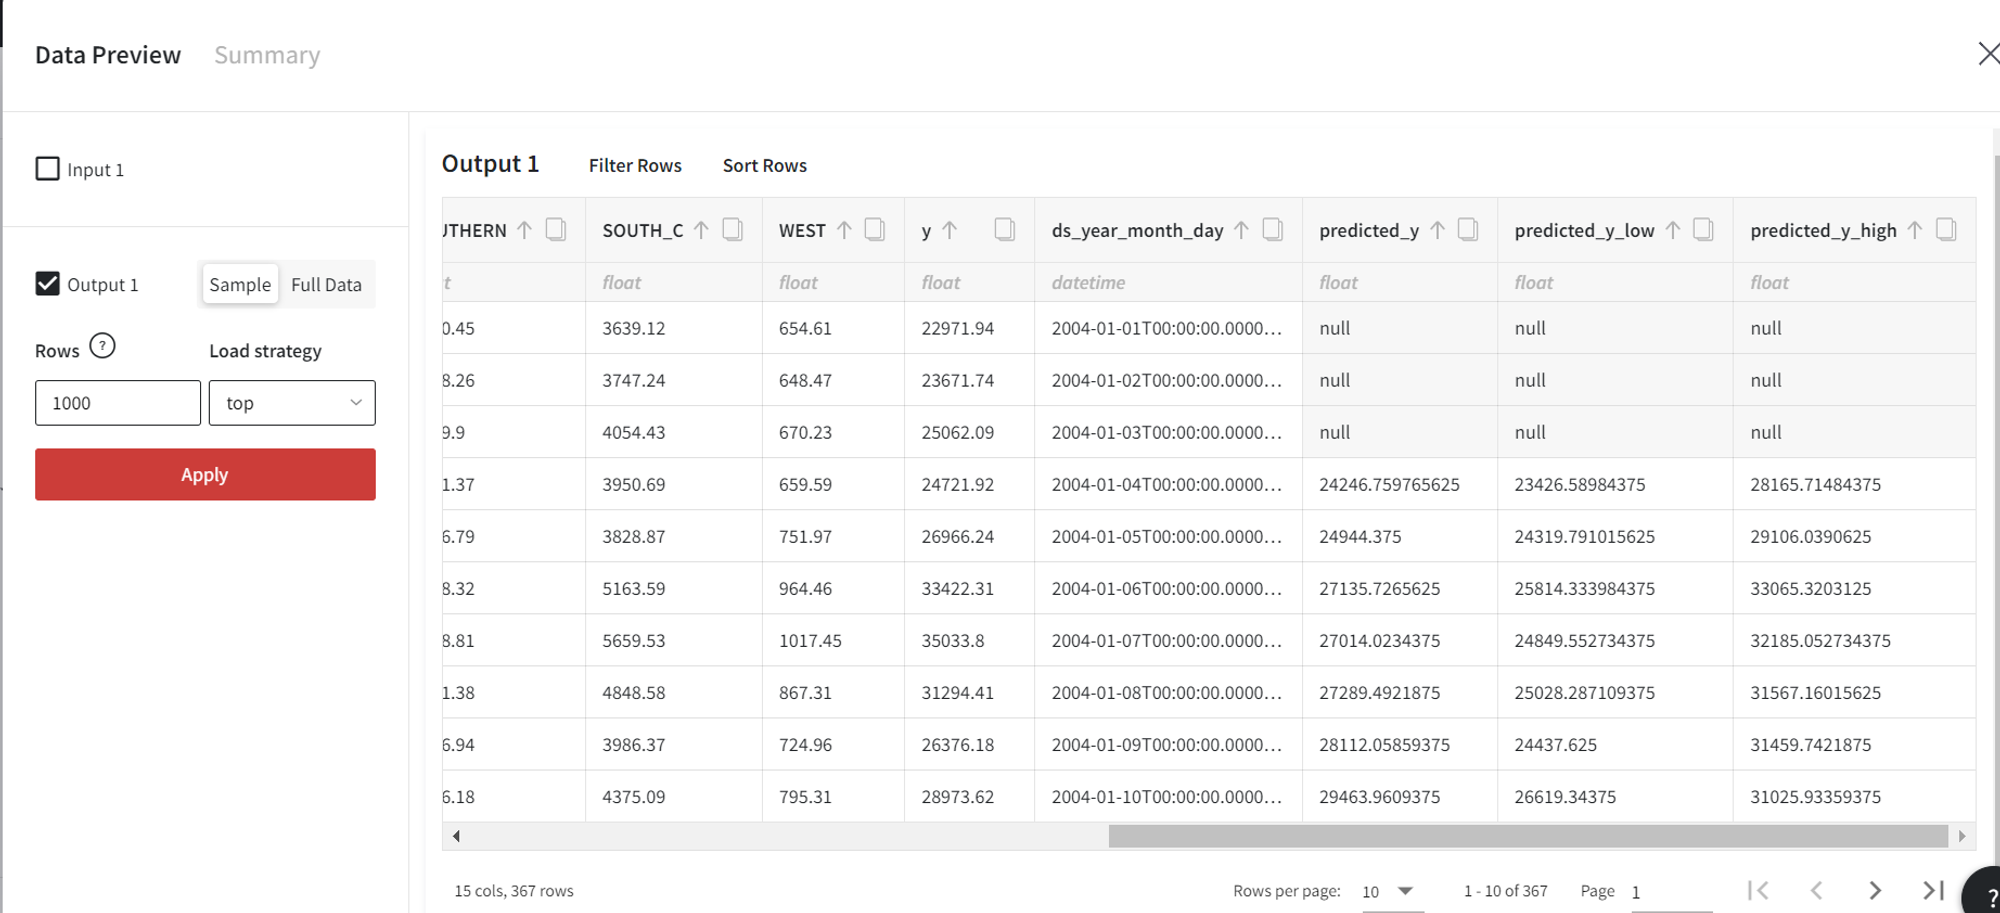
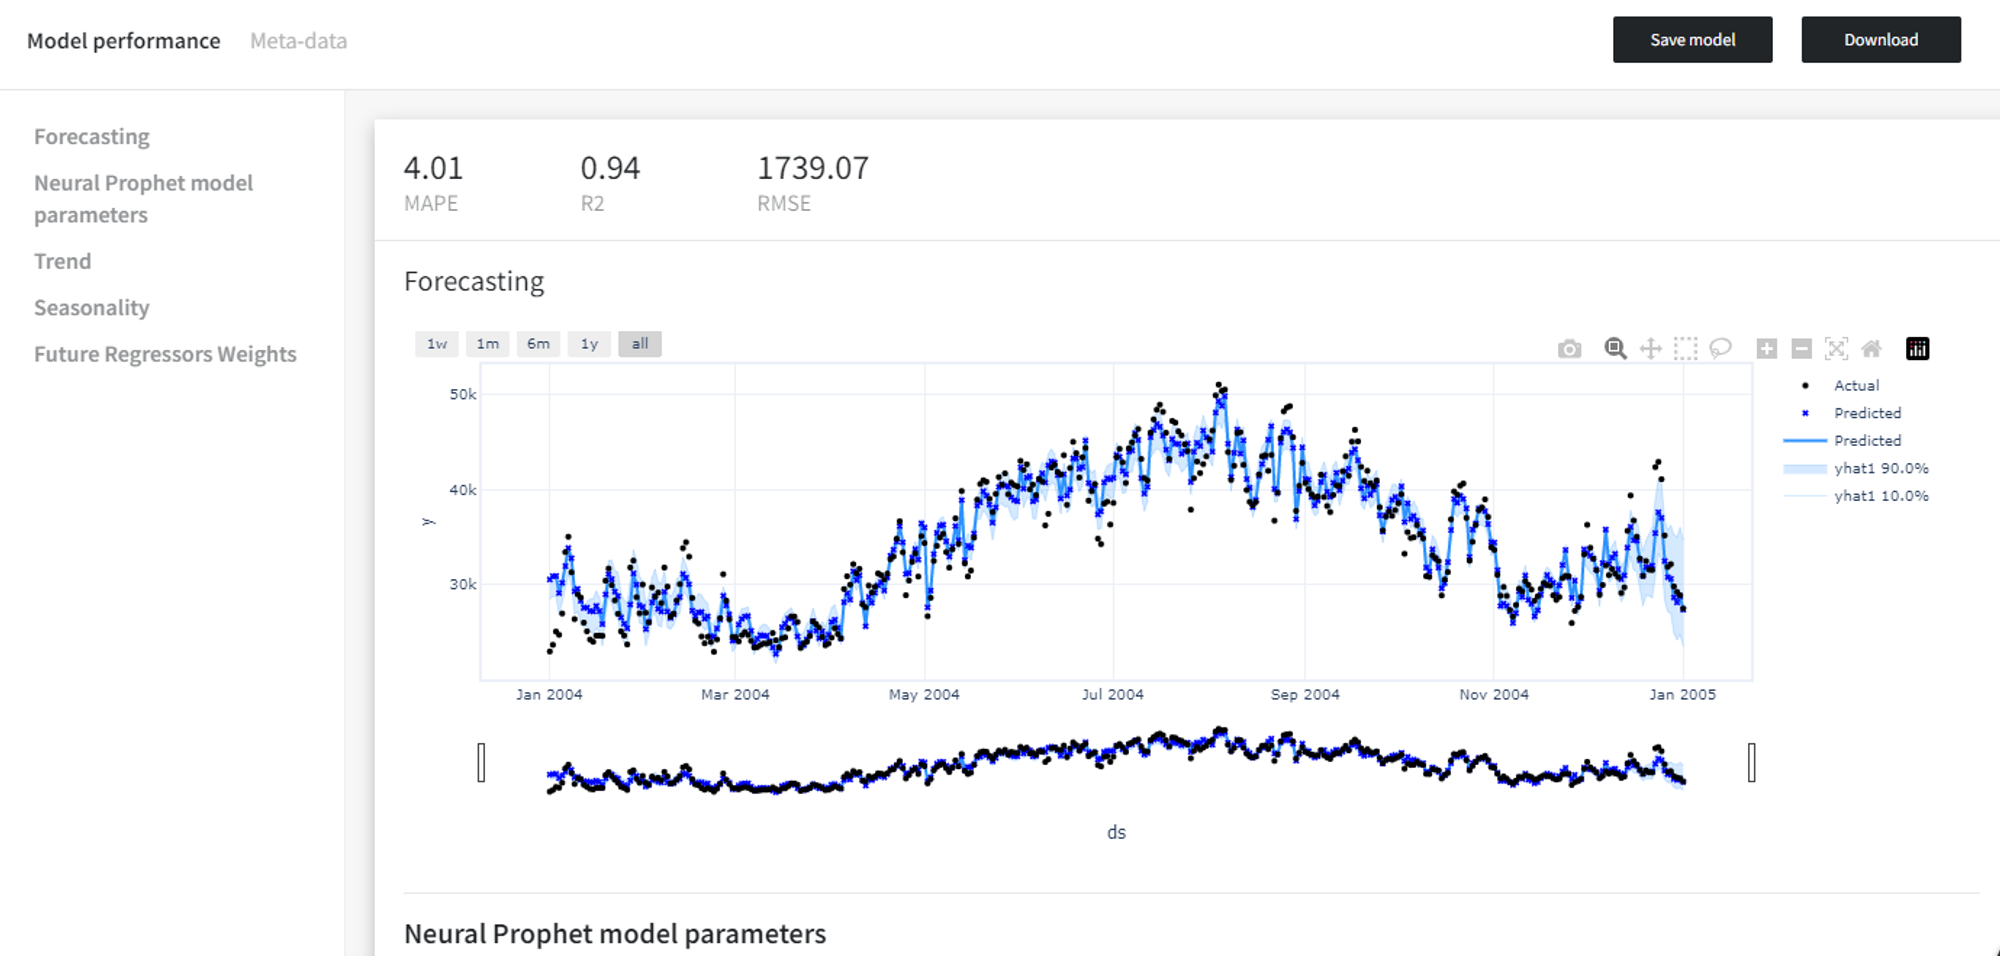
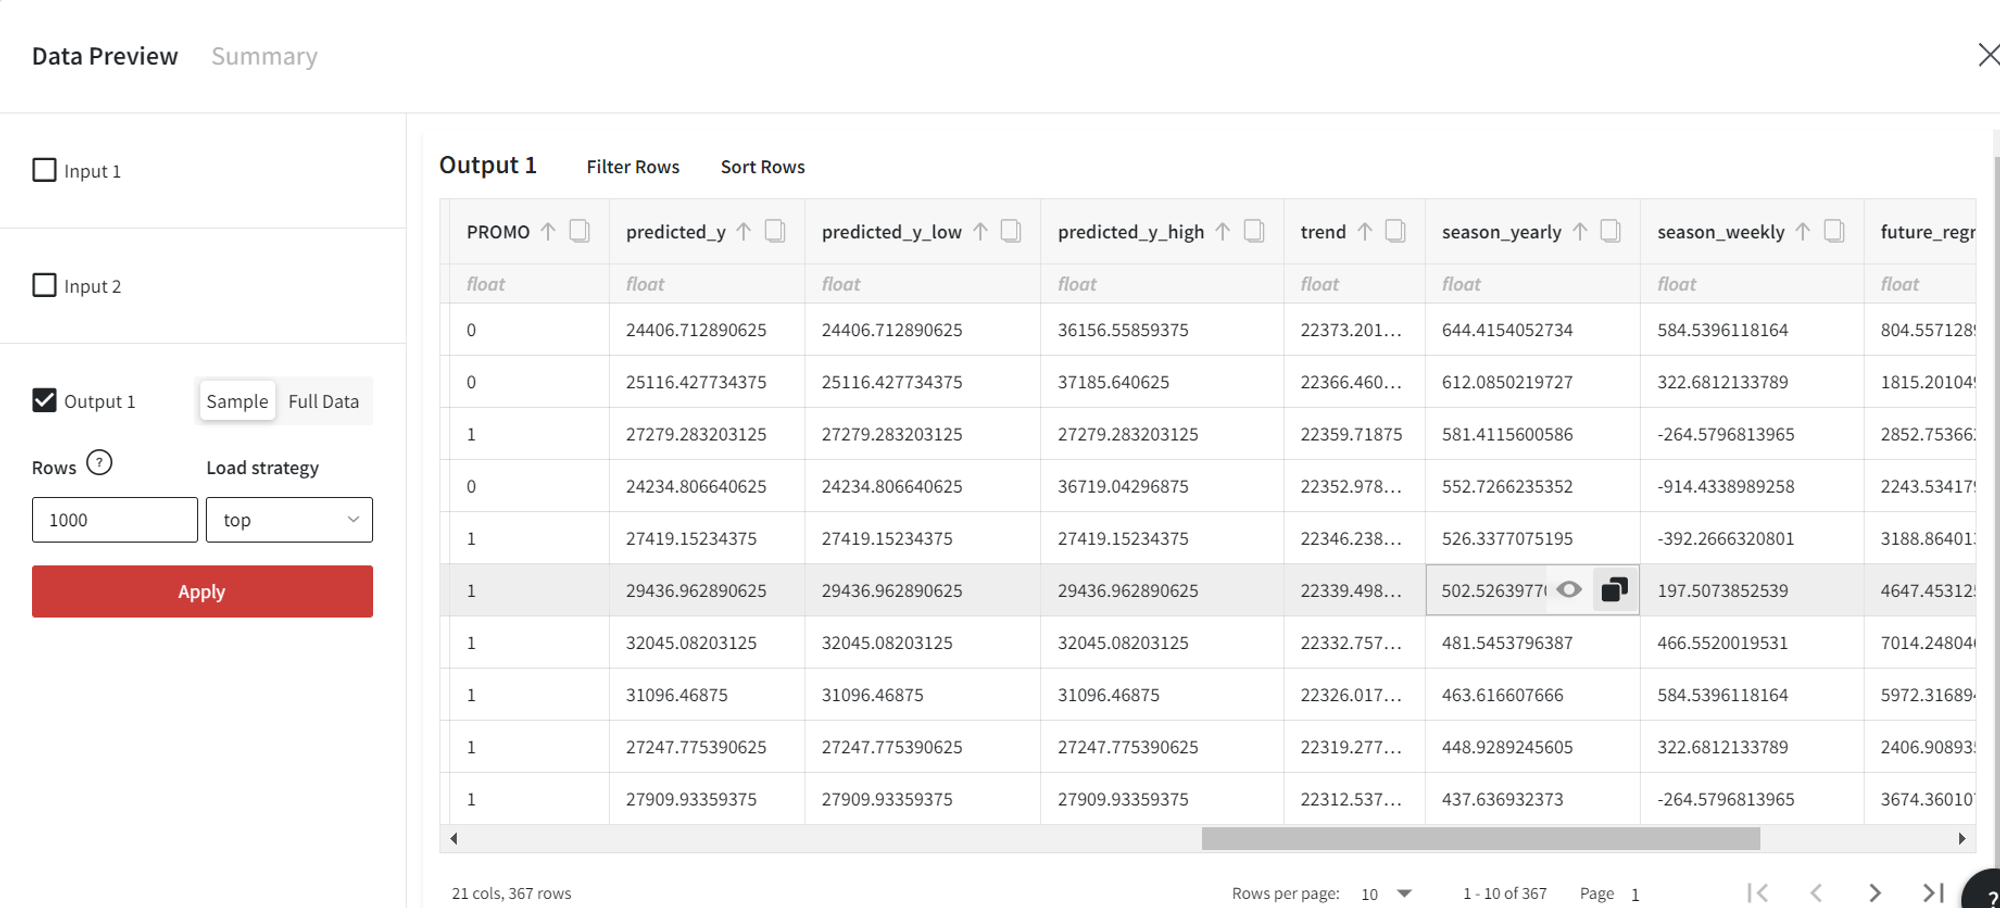
In the Data Preview section, we can view the output dataset of the model. It contains three additional columns: predicted values and confidence intervals.
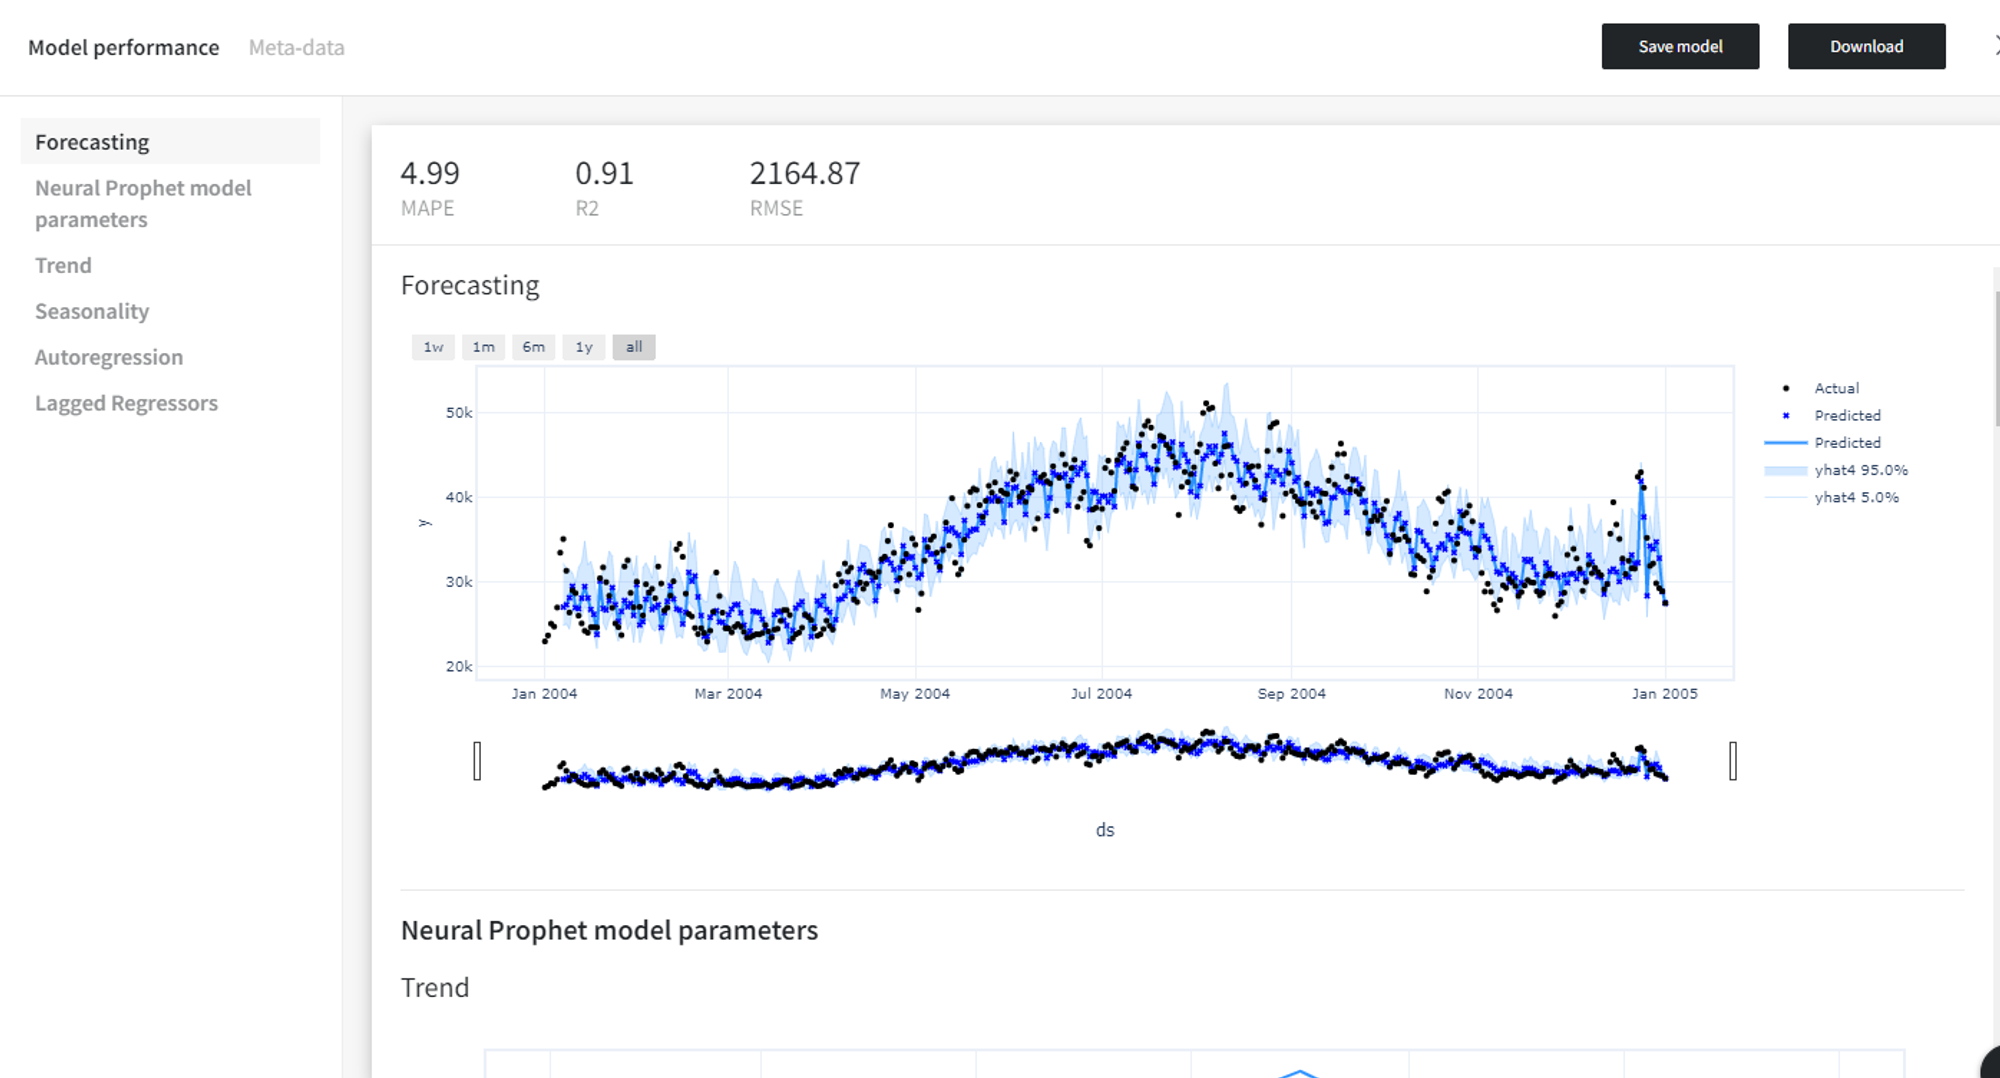
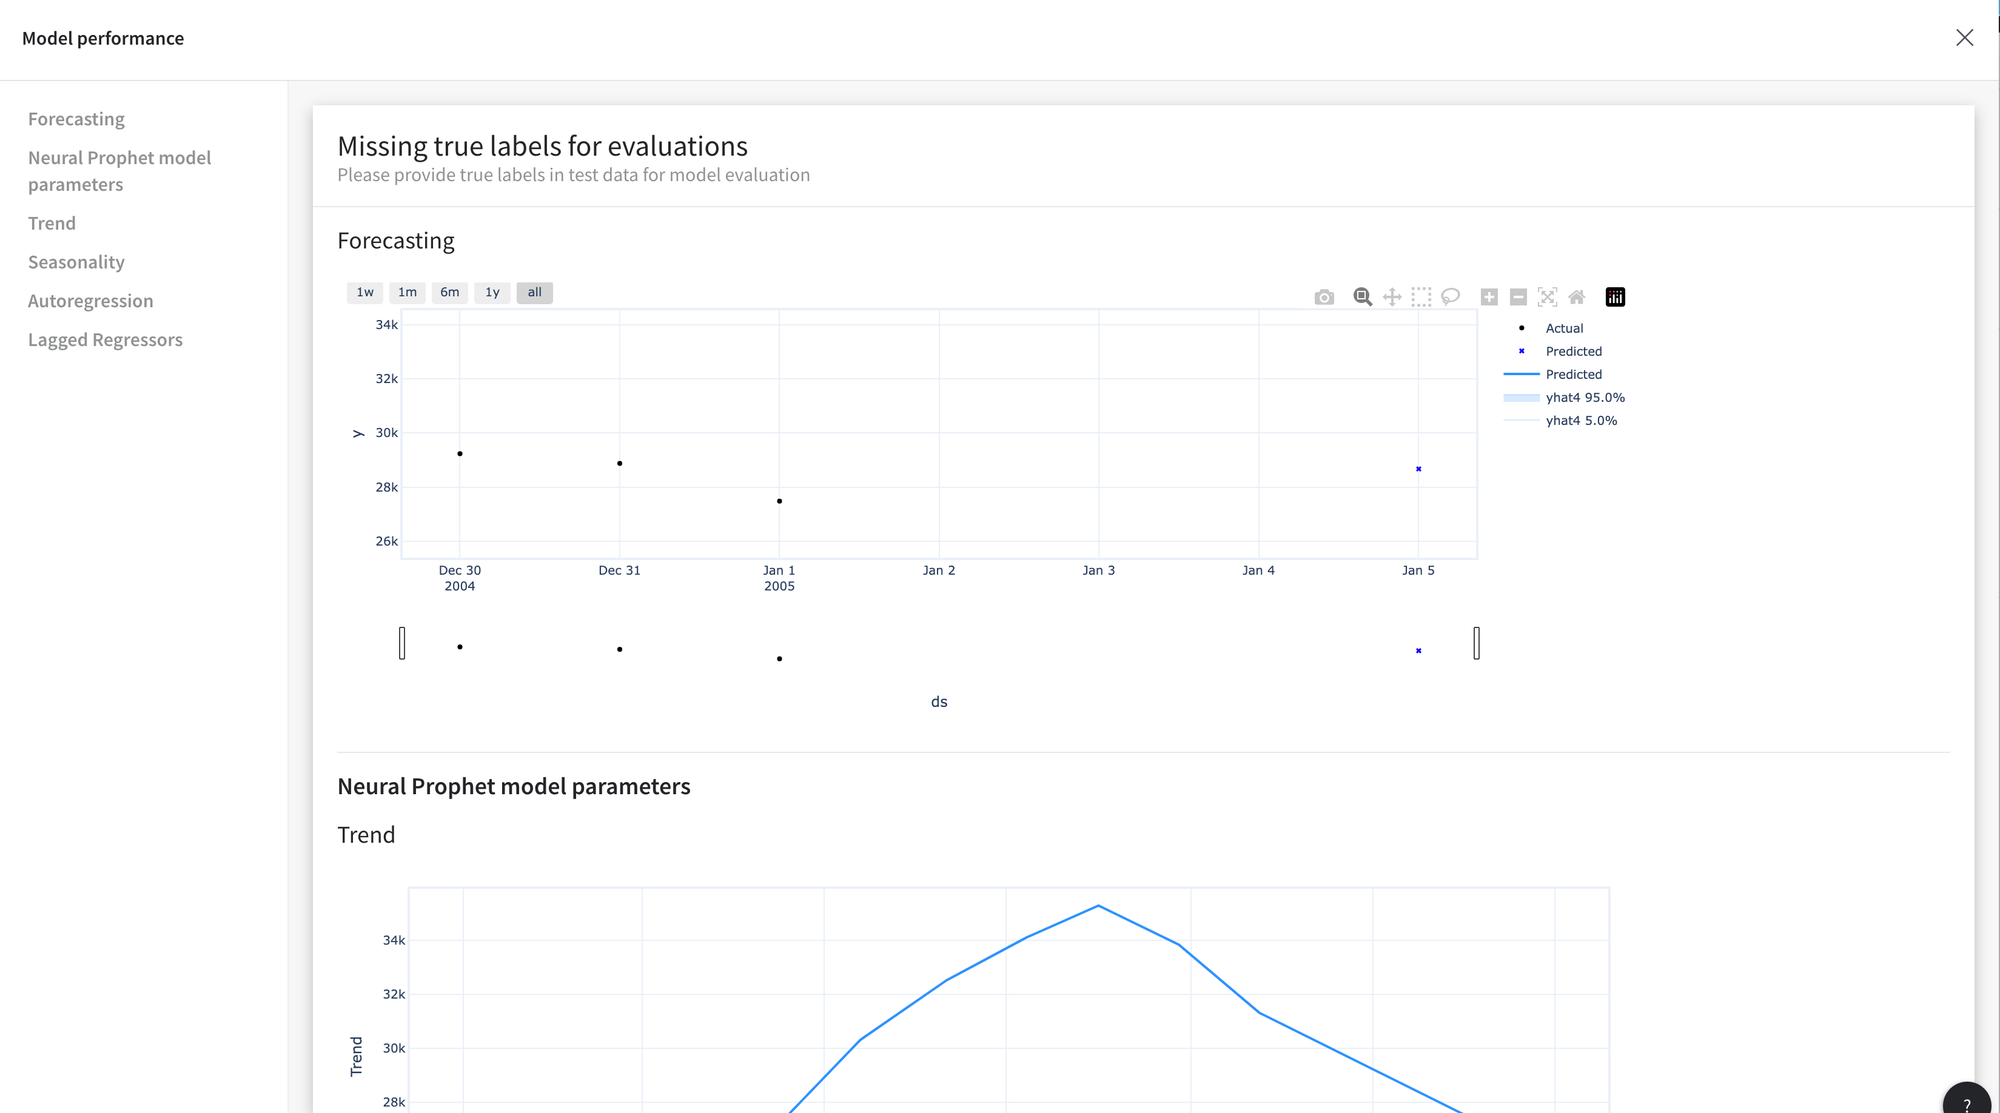
In the Model Info, apart from the model metrics, we can look at the plots, featuring the forecasting results and all the model’s components.
To make predictions for the future period, first, we can create the future dataset for a trained Neural Prophet model with the Prepare Future Dataset brick.
Then we apply the Predict brick to get the forecasts.

To get the Neural Prophet model performance, forecasting plot, and components for future data predictions, click on the Model performance tab in the Predict brick. You will get the following results:
To specify more advanced options, we can configure the model in the Advanced mode.
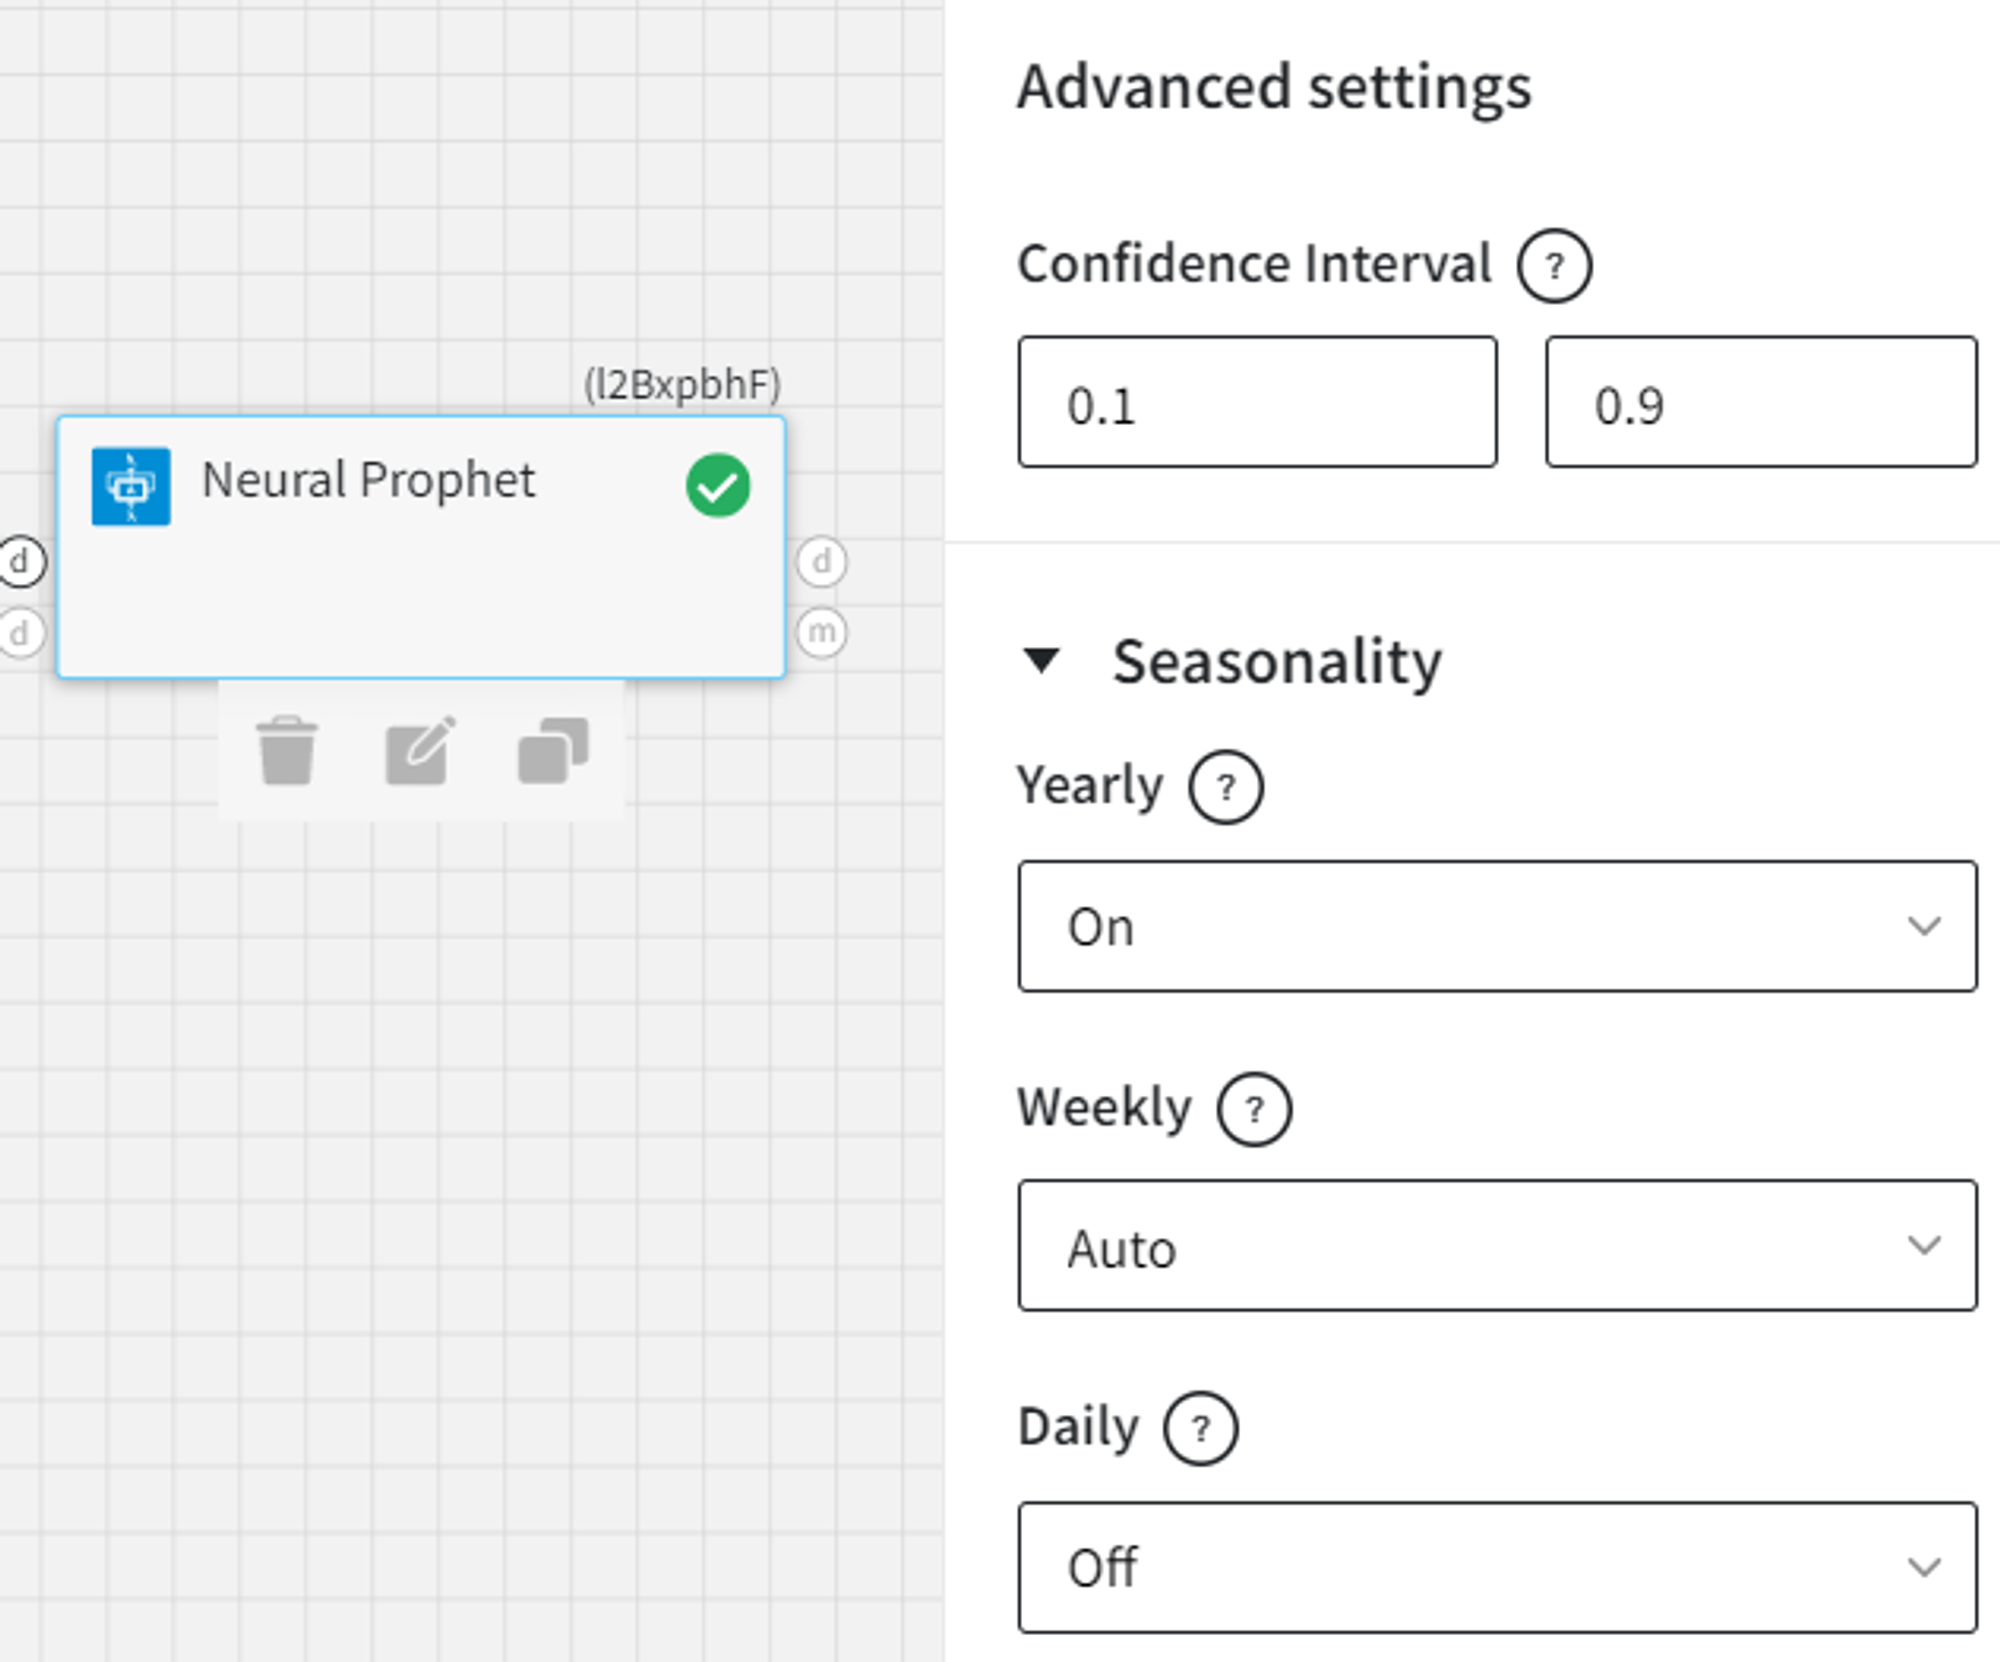
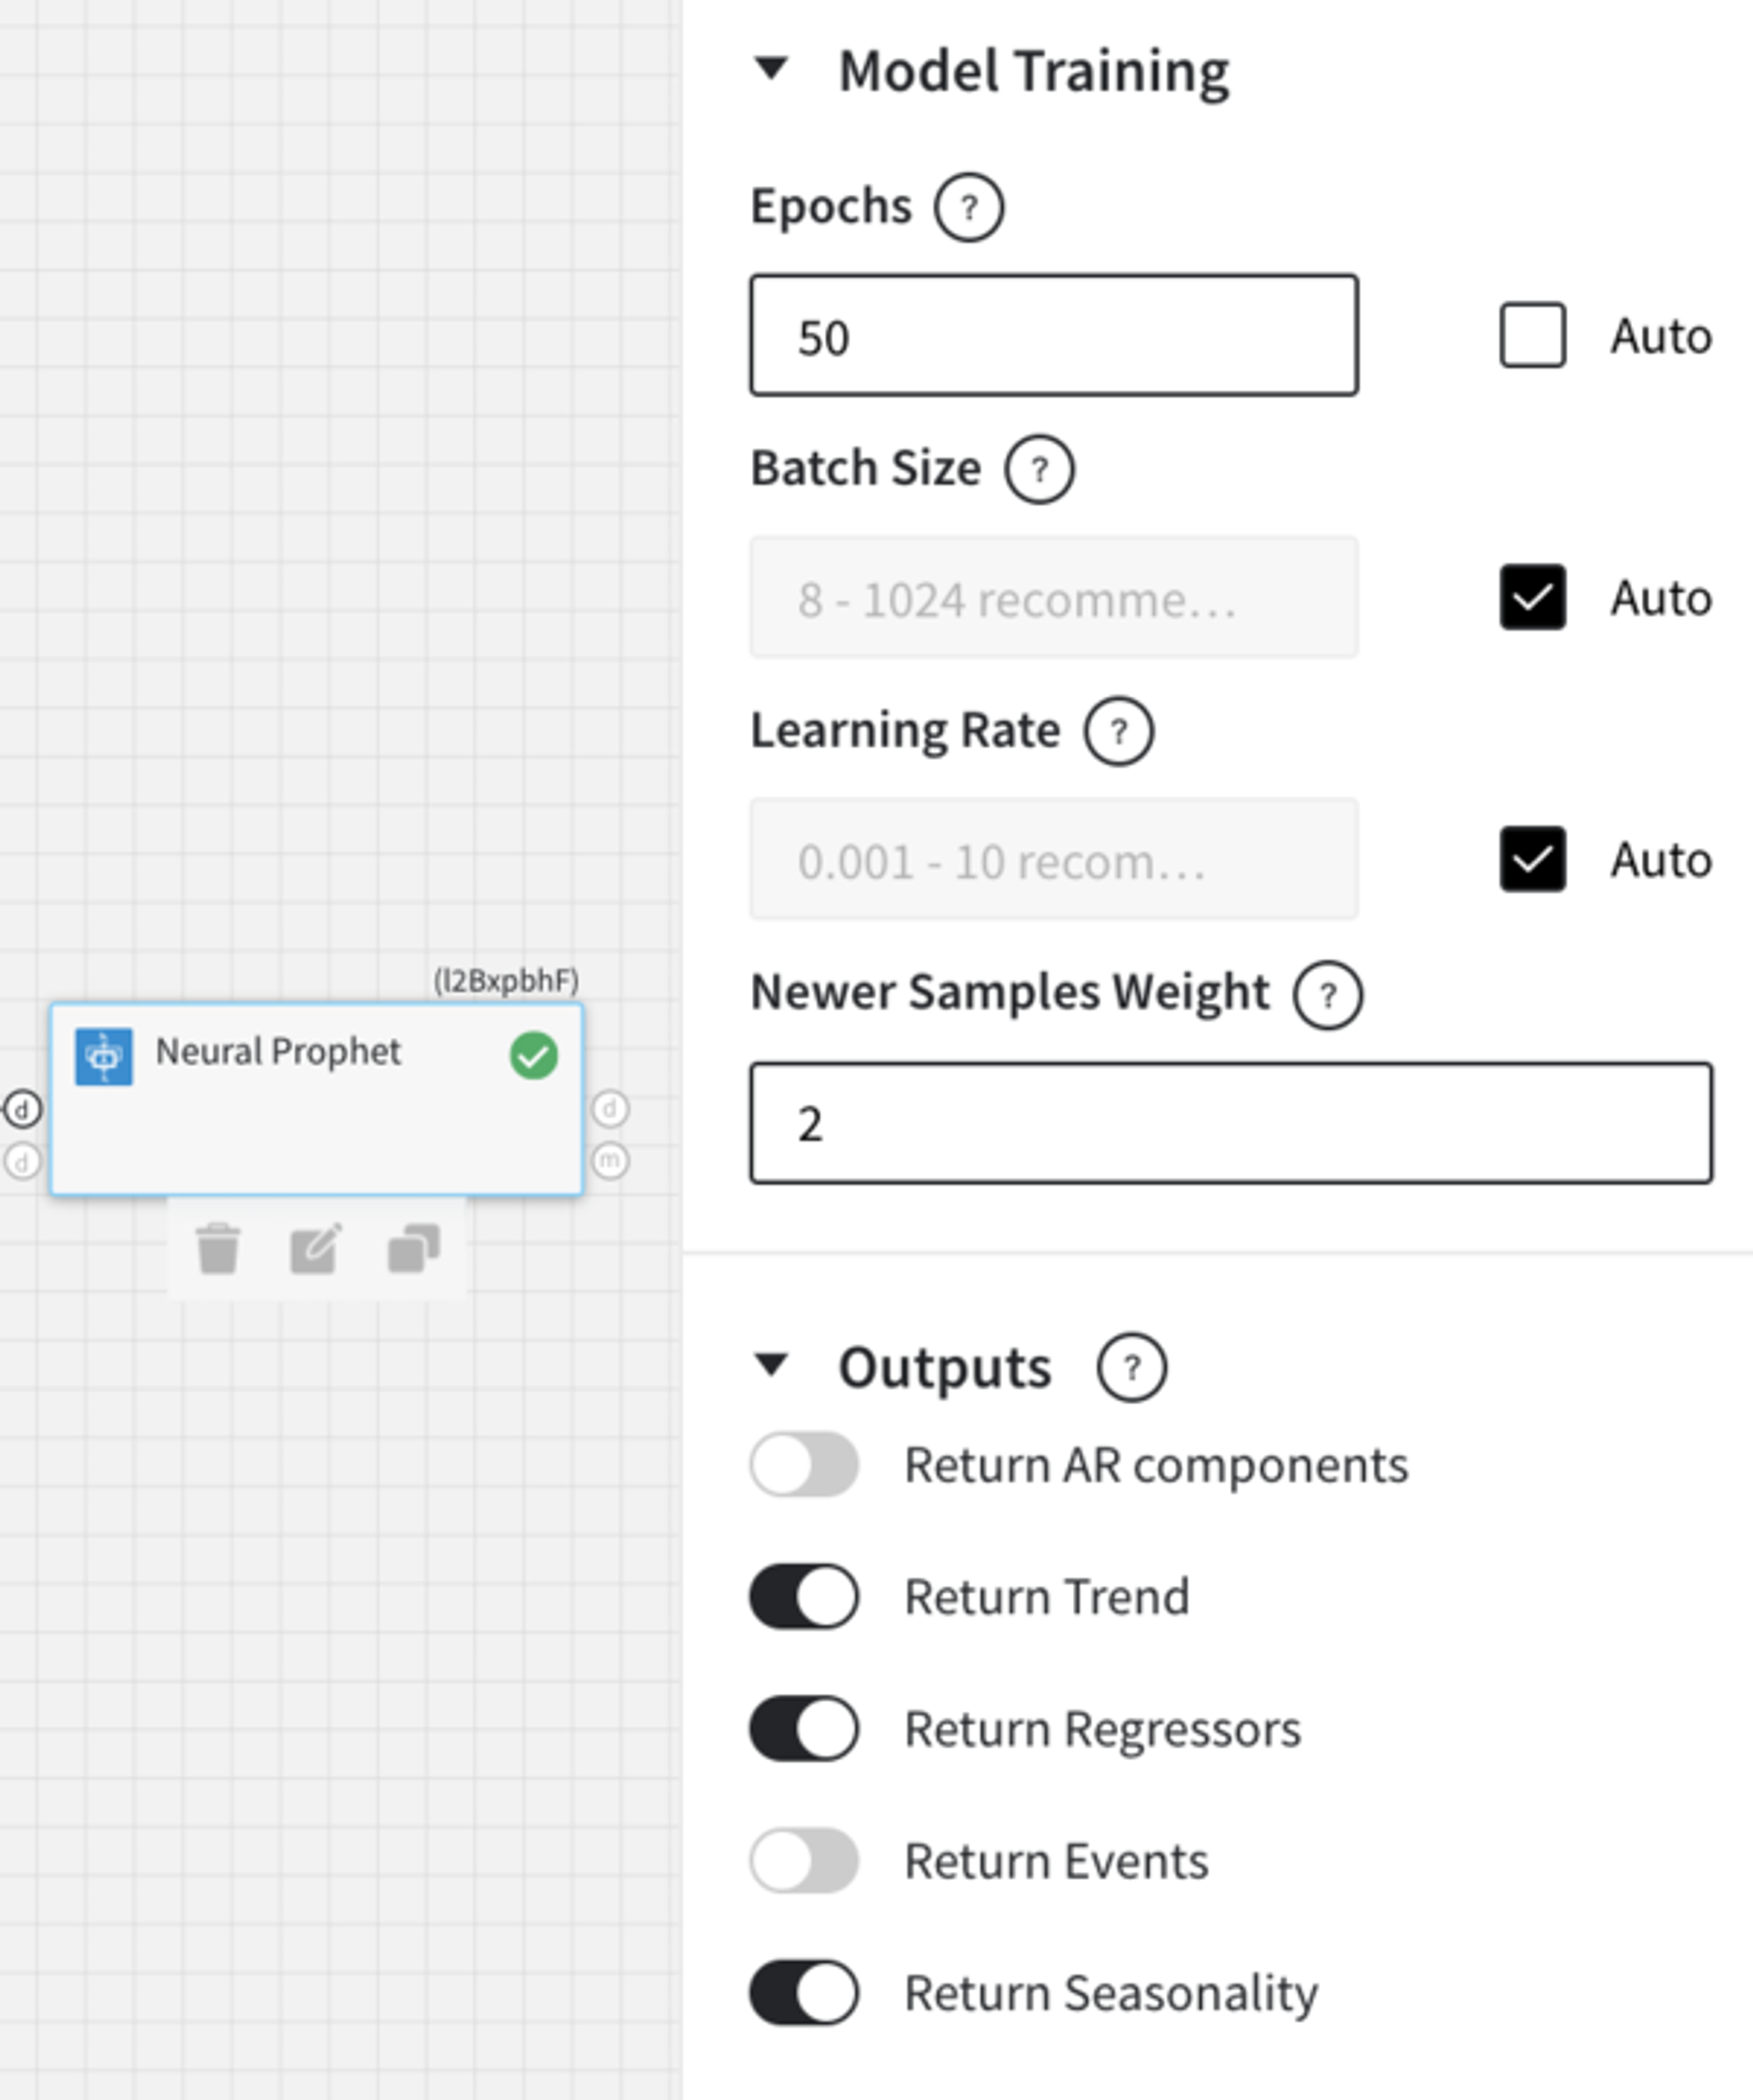
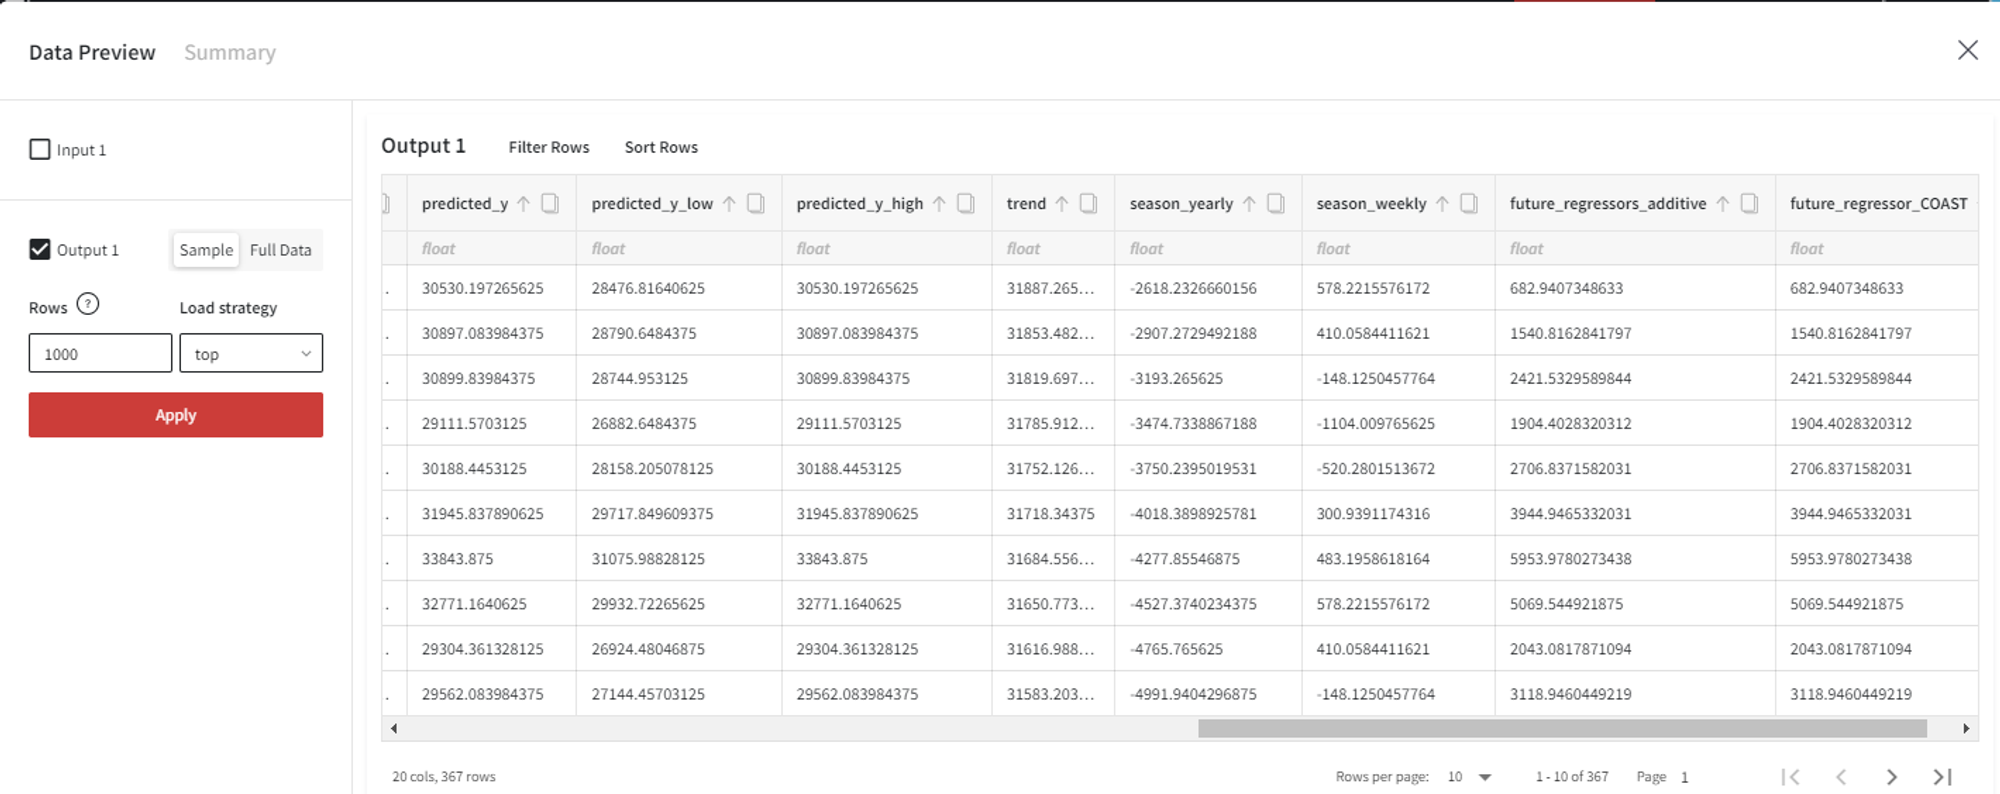
For instance, we add the ‘COAST’ column as a future regressor, change the confidence interval bounds, enable yearly seasonality, disable daily seasonality, set 50 training epochs, and return the trend, seasonality, and regressors in the output dataset.
The model output data and the forecasting results are the following:
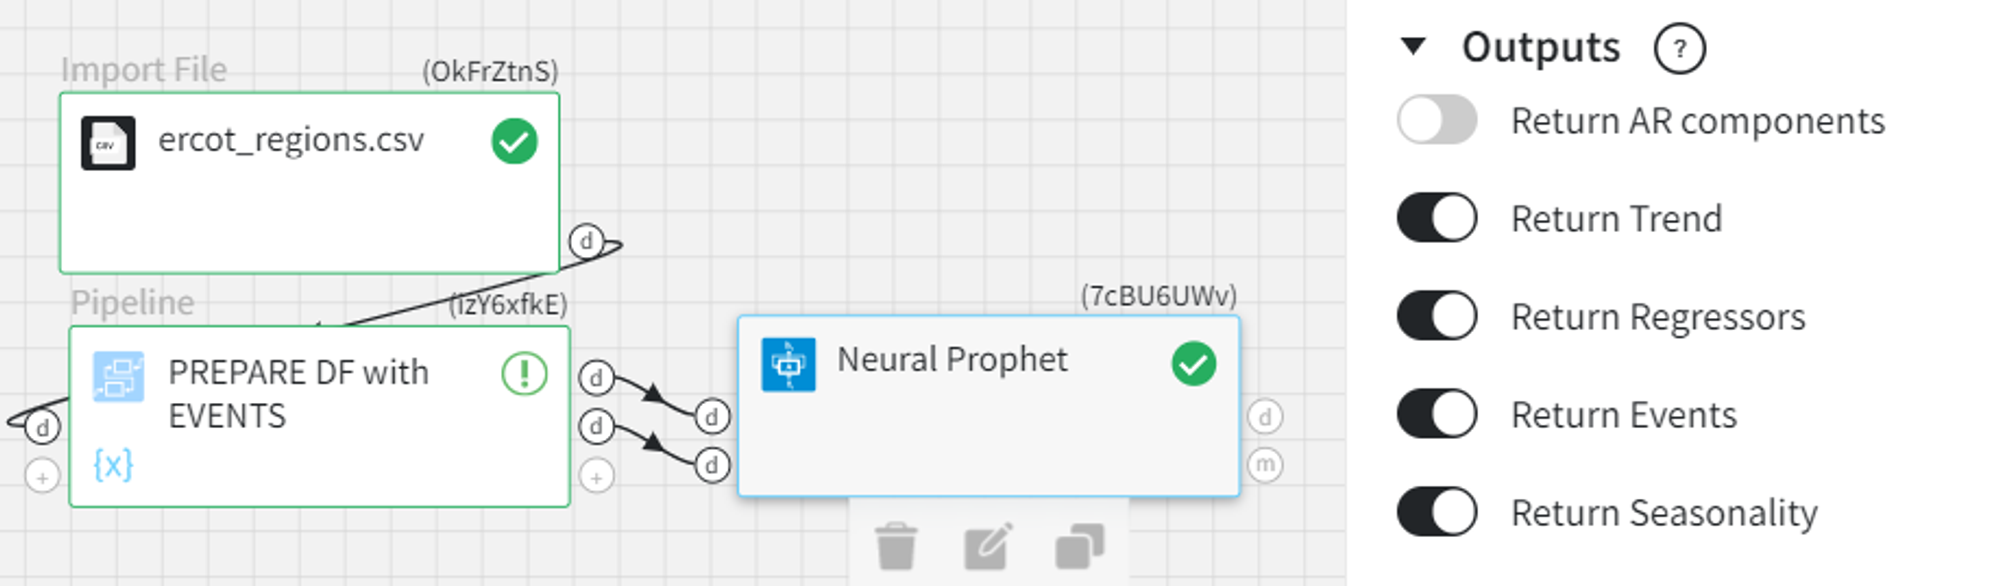
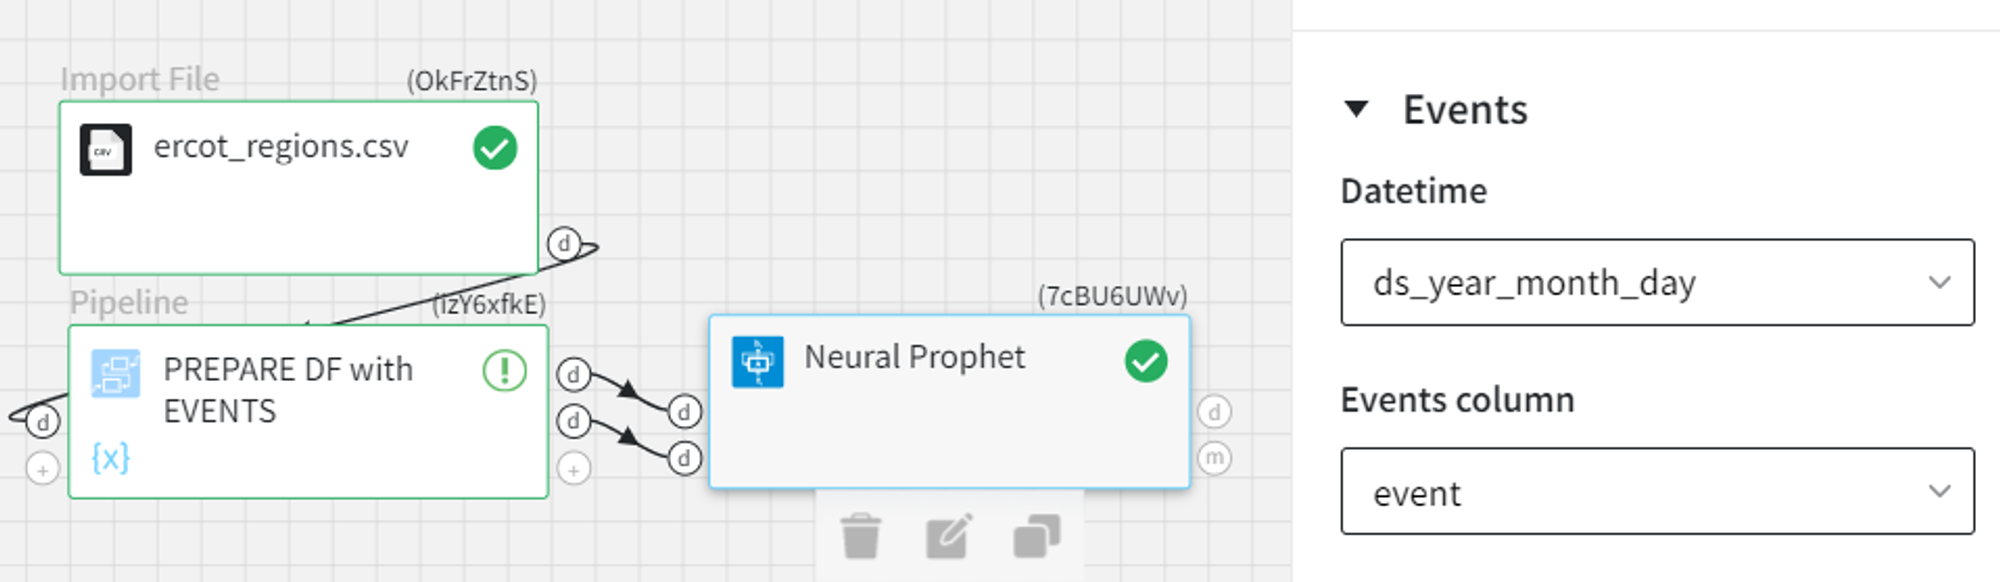
Finally, let’s add custom events to the model from the example above.
We need to prepare the dataset for the optional events input, which must contain the dates when some event occurs and the name of the event at the specific date.
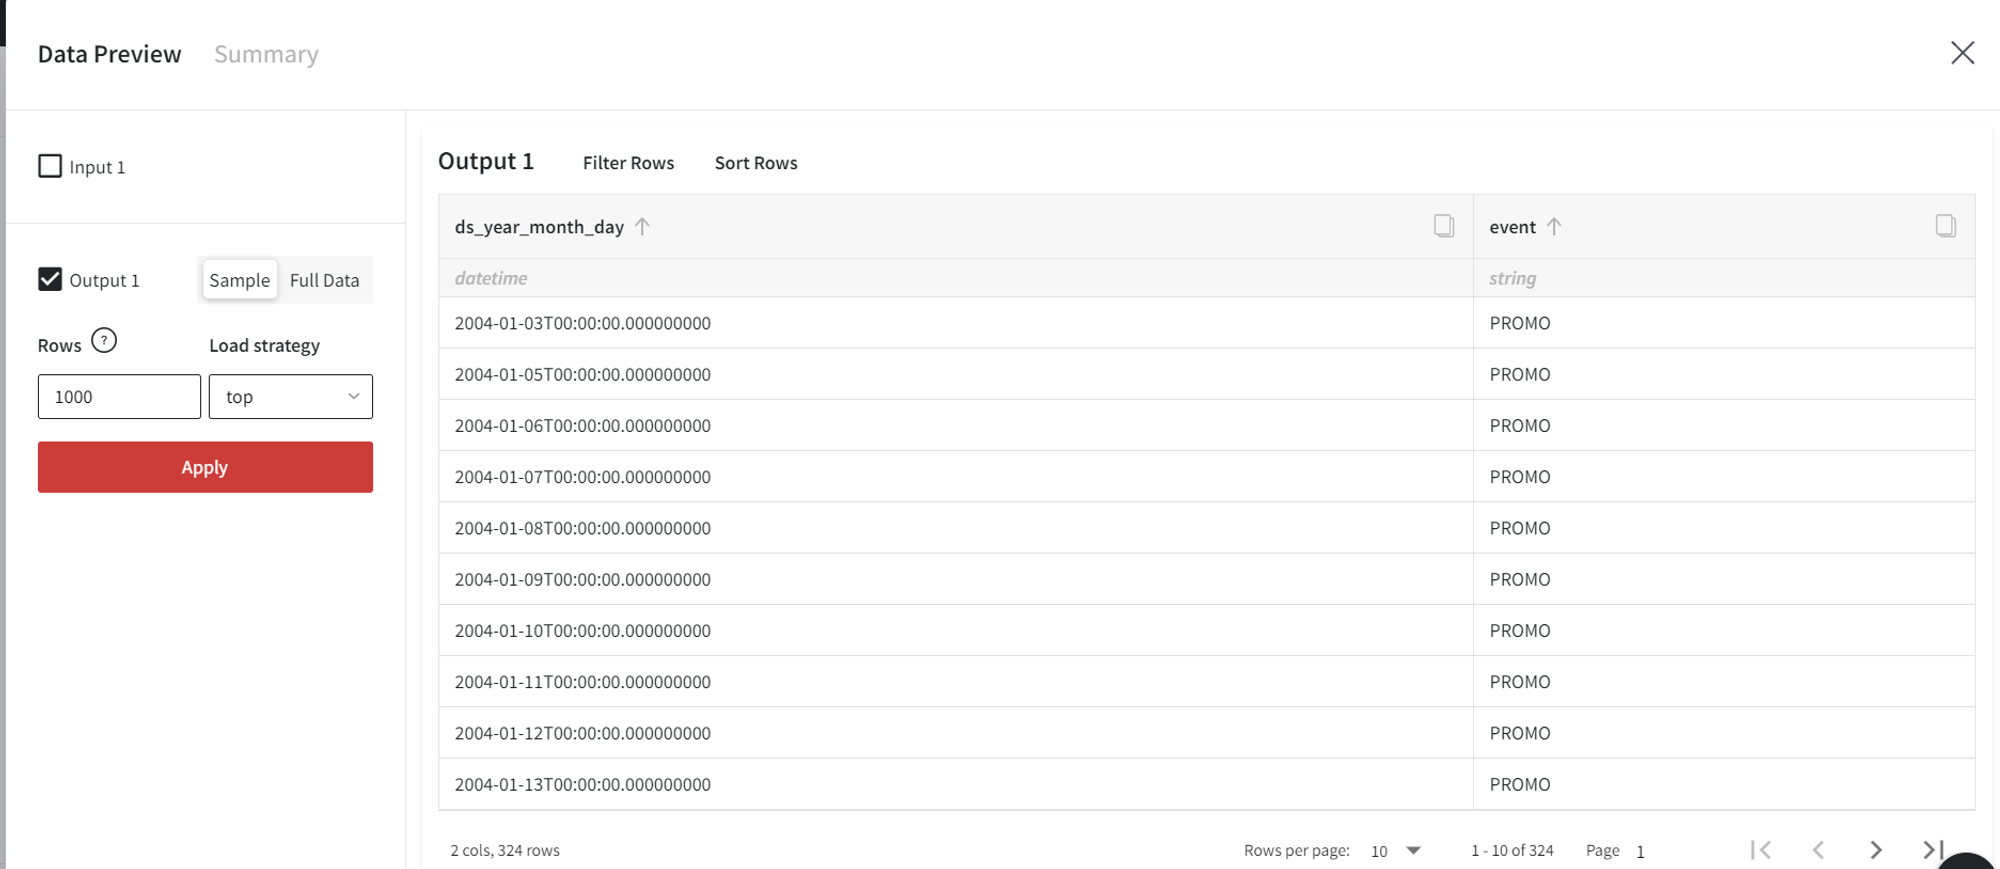
After connecting this dataset, we need to select the ‘Datetime’ and the ‘Events column’ in the Events section of the model settings.
As a result, the custom events are considered during the model training and we get binary column(s) for every event with their occurrences in the output.
The effects of the custom (and country, if present) events on the model can be viewed by enabling ‘Return Events’.